Geozone groups
A group is a named, coloured set of related geozones — all the dry ports, all the border posts. Groups do three things:
- They sort the list on the Geozones screen into sections, so you can find a zone quickly.
- They colour their zones on the map: a zone without a colour of its own is drawn in its group's colour.
- An alert policy can watch a whole group instead of a single zone. One policy then covers every dry port, and a new dry port is covered as soon as you put it in the group.
A zone can belong to several groups at once — a border post can be in both "Border posts" and "Djibouti corridor".
Before you start
Your role must allow you to manage groups (Supervisor, Operational manager and System admin can). If it does not, the New group button and the Edit group pencils are not on the Geozones screen.
Create a group
- Open Configuration → Geofencing.
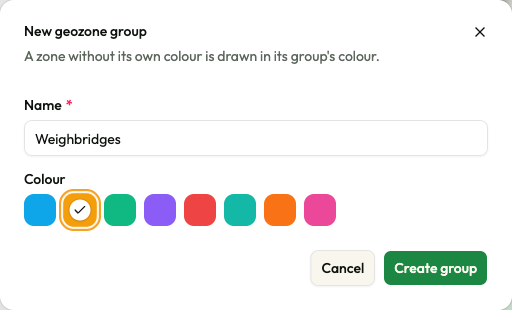
- Select New group at the top of the screen. The window New geozone group opens, with the line "A zone without its own colour is drawn in its group's colour."
- Type a Name — what the set of places is called, for example "Weighbridges".
- Choose a Colour from the eight squares. The chosen one has a ring and a tick.
- Select Create group, or Cancel to close without creating anything.
| Field | Required | What to enter | Rules and messages |
|---|---|---|---|
| Name | Yes | The name of the set, for example "Customs Yards". | Leaving it empty gives the message Group name is required. Up to 200 characters. |
| Colour | — | One of eight colours. The first (sky blue) is chosen to begin with. | A colour is always set. |
The message Group created confirms it. The new group appears in the list straight away, with the line No geozones in this group until you put a zone in it.
Put a zone into groups
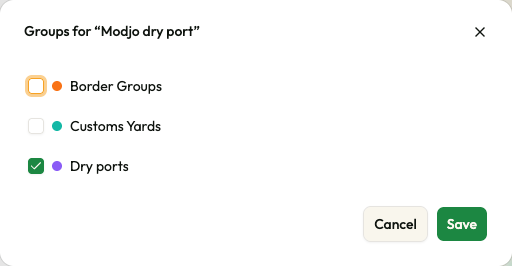
There are two ways. Either way, tick every group the zone belongs to; untick them all to take the zone out of every group (it then shows under UNGROUPED).
From the list — quickest for a zone that already exists:
-
On Geozones, find the zone.
-
Select the ⋯ button on its row, then Groups….
-
The window Groups for “zone name” opens. Tick the groups.
-
Select Save. The message Groups saved confirms it.
In the editor — when you create or edit a zone, tick the groups under Groups and save the zone. See Draw a geozone.
The zone is then listed under each of its groups.
What the colour is for
A group's colour marks its section in the list. On the map, a zone set to Use group colour — the choice every new zone starts with, and every zone created by CSV import — is drawn in its group's colour. If it is in several groups, the first one in alphabetical order gives the colour. A zone that has been given its own colour in the editor keeps it.
To colour a whole set of zones: set the colour on the group, and leave the zones on Use group colour.
Rename or recolour a group
-
On Geozones, select the pencil (Edit group) on the group's section heading.
-
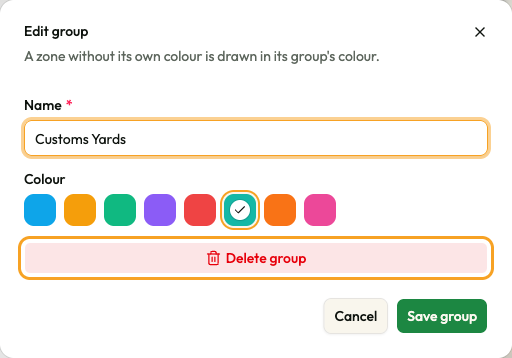
The window Edit group opens.
-
Change the Name or the Colour.
-
Select Save group. The message Group updated confirms it.
Delete a group
- Open the group with its Edit group pencil.
- Select Delete group.
- The question Delete group? appears, with "“group name” will be removed. Its geozones keep their shape and any other groups."
- Select Delete group to go ahead, or Cancel.
The message Group deleted confirms it. The zones themselves are not touched: a zone that was in no other group moves to UNGROUPED.
If an alert policy watches the group, the red message "This group is used by: … Change those policies first." appears and nothing is removed. Point those policies at another zone or group, or delete them, then try again.
A deleted group cannot be brought back from the portal: create it again and put its zones back in it.