Users
The Users screen holds the accounts that let Ministry staff sign in to IFMS. From here you create an account for a new colleague, choose what that colleague is allowed to do (their roles), keep their contact details up to date, and switch an account off when someone leaves.
You never see, choose or type anyone's password here. New colleagues set their own password from an email IFMS sends them.
Who can open this screen
Only two roles can: System admin and Operational manager. Everyone else has no Users item in the sidebar, and typing the address by hand shows "Access denied". See What each role can do.
What you can do once you are here also depends on your role: an Operational manager can add and change colleagues and give any of the three Ministry roles. See Which roles you can give.
How to open it
- In the sidebar, open the Administration group.
- Select Users.
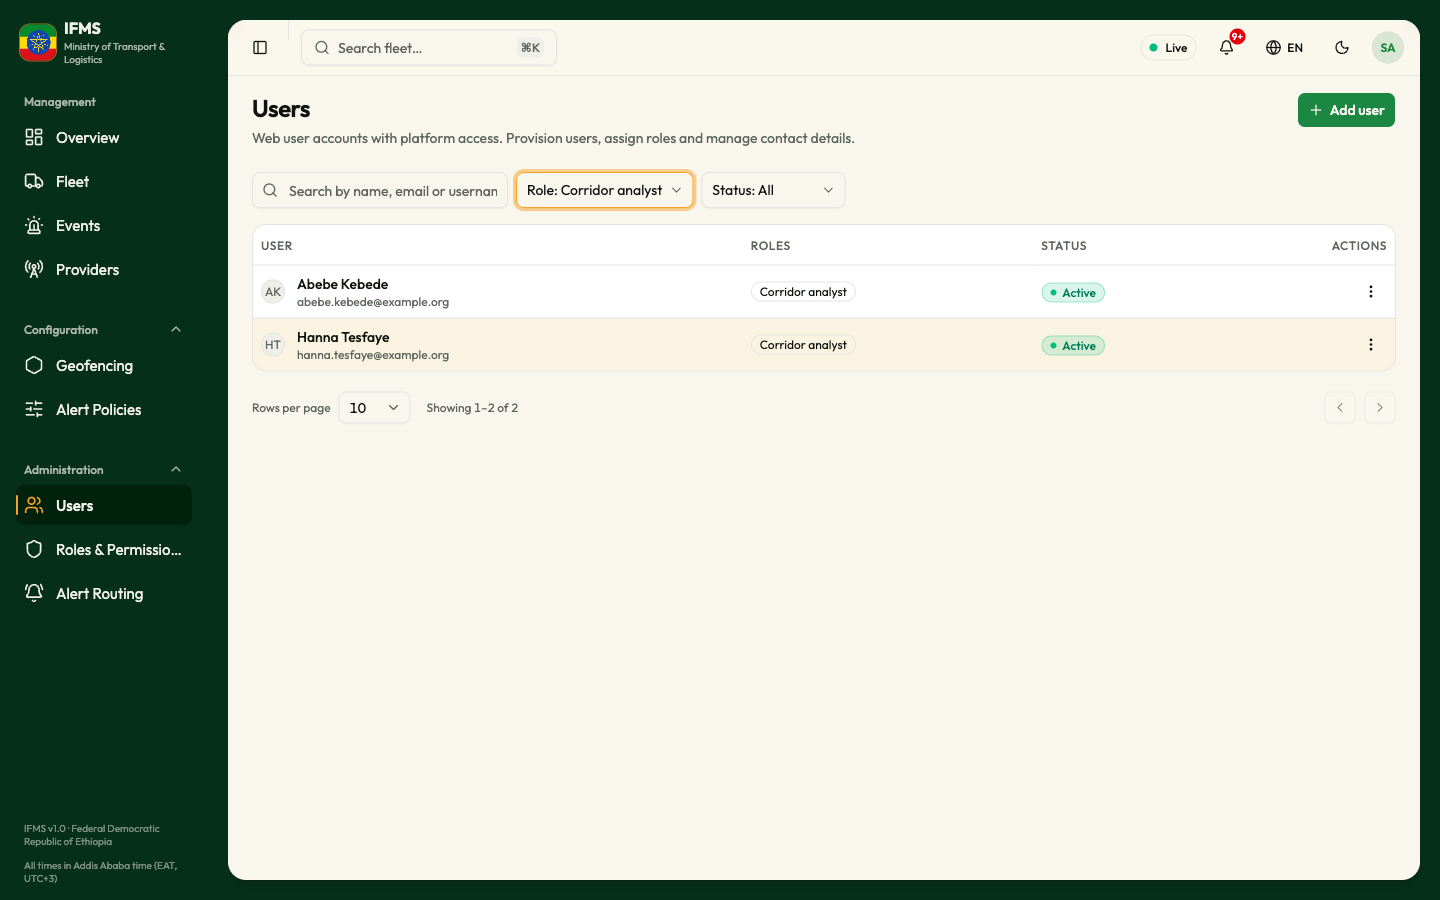
Who appears in the list
The list holds every Ministry staff account, active and inactive together,
oldest account first. It includes System Administrator, the account the
Ministry was given when IFMS was installed. That account signs in with the name
system-admin rather than an email address. You can edit it like any other,
and it can be deactivated only by somebody else and only while another active
System admin remains.
Accounts used by other computer systems to talk to IFMS are not in the list.

The screenshots in this chapter are filtered to the demonstration accounts. On the live system the list shows every colleague who has an account.
The toolbar
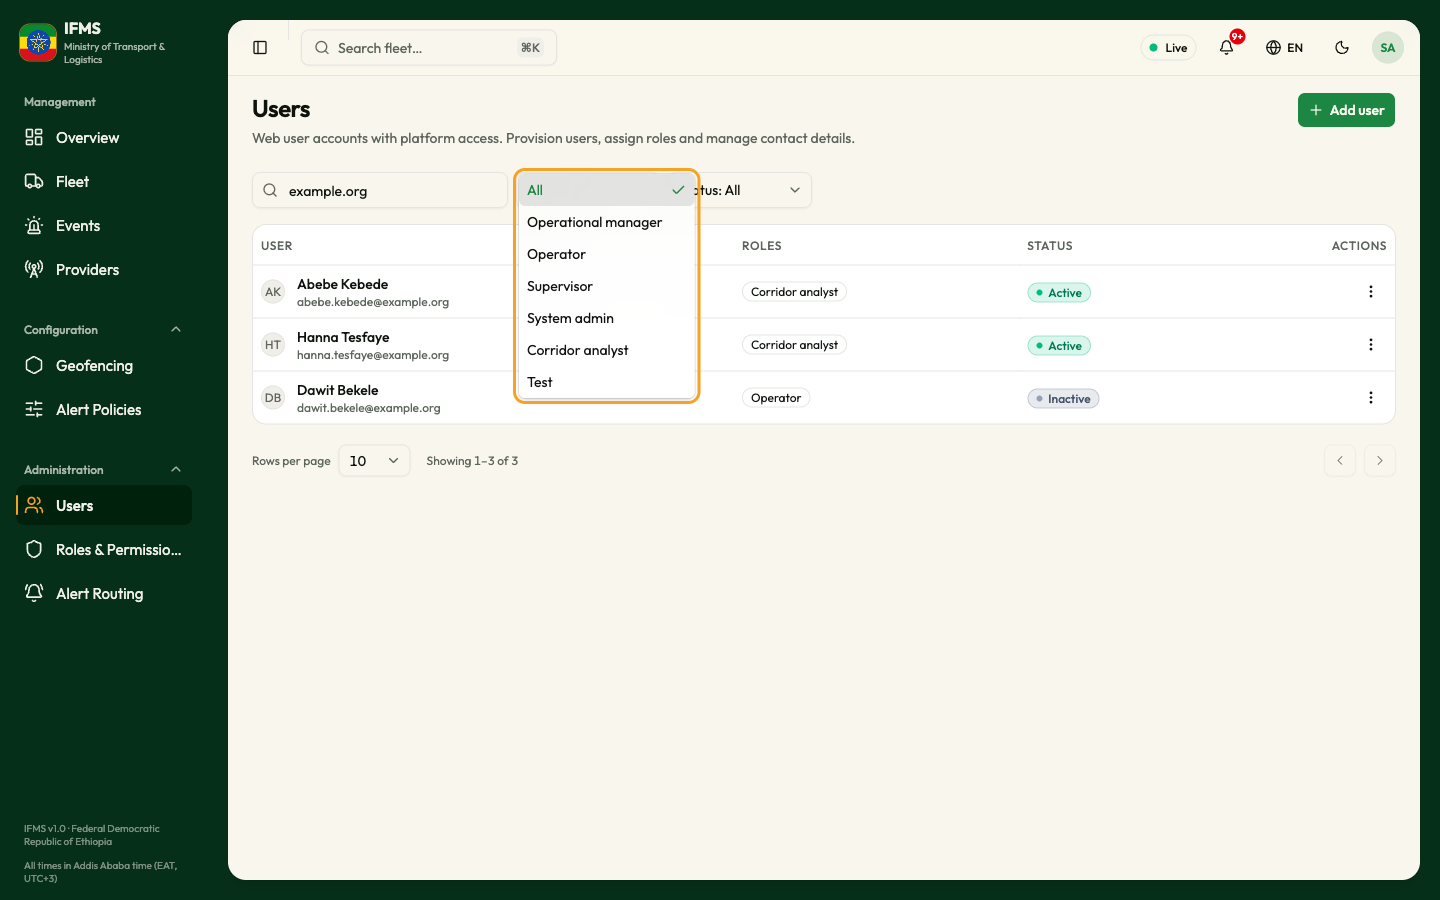
| Control | What it does |
|---|---|
| Search by name, email or username… | Type a few letters and the list narrows as you stop typing. |
| Role | Shows only people who hold the role you pick. The first choice is All; the others are every role, including ones that are switched off. |
| Status | All, Active or Inactive. |
Both filters look at the whole list, not just the page in front of you. Changing one takes you back to the first page, and the count under the table shows how many people match.
The search box matches the first name, the last name, the email address and the sign-in name, each on its own. Type one name: "Abebe" or "Kebede" finds Abebe Kebede, but "Abebe Kebede" finds nothing. Phone numbers and ID numbers are not searched.
The table
| Column | What it shows |
|---|---|
| USER | A circle with the person's initials, their full name and, underneath, their email address. The email address is also their sign-in name. |
| ROLES | One outlined badge per role. A person with no roles shows a dash (—). |
| STATUS | Active (green) or Inactive (grey). An inactive account cannot sign in at all. |
| ACTIONS | The three-dot button that opens the row menu. It is missing when you have no right to change that account. |
Below the table, Rows per page (10, 20, 50 or 100), the count ("Showing 1–7 of 7") and the arrows for the previous and next page.
Selecting an active row opens Edit user for that person.
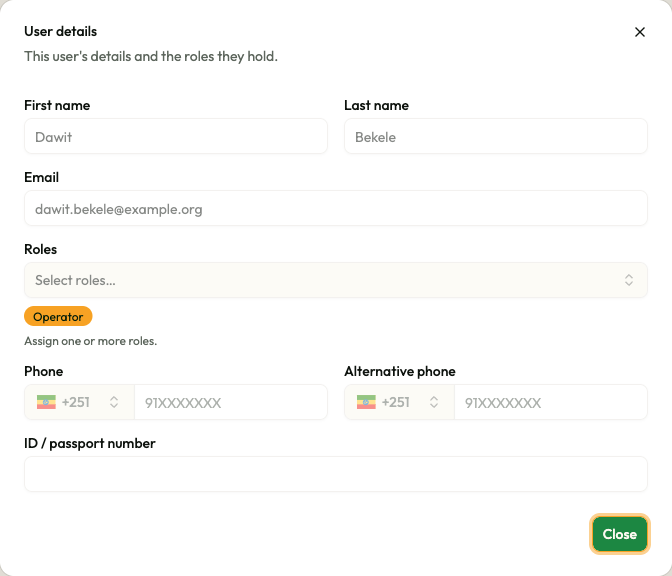
Selecting an inactive row opens User details instead — "This user's details and the roles they hold." Nothing in it can be changed; select Close when you are done. To change an inactive account, reactivate it first. If your role does not allow you to change users, every row opens User details.
When the list is empty
If nothing matches, the table is replaced by "No users found" and "Try a different filter, or add a new user." Clear the search box and set both filters back to All. While the list is loading you see grey placeholder rows.
If the list itself fails to load, the table reads "This list could not be loaded" with a Try again button.
The row menu
Select the three-dot button at the right of a row (its name for screen readers is Open actions).
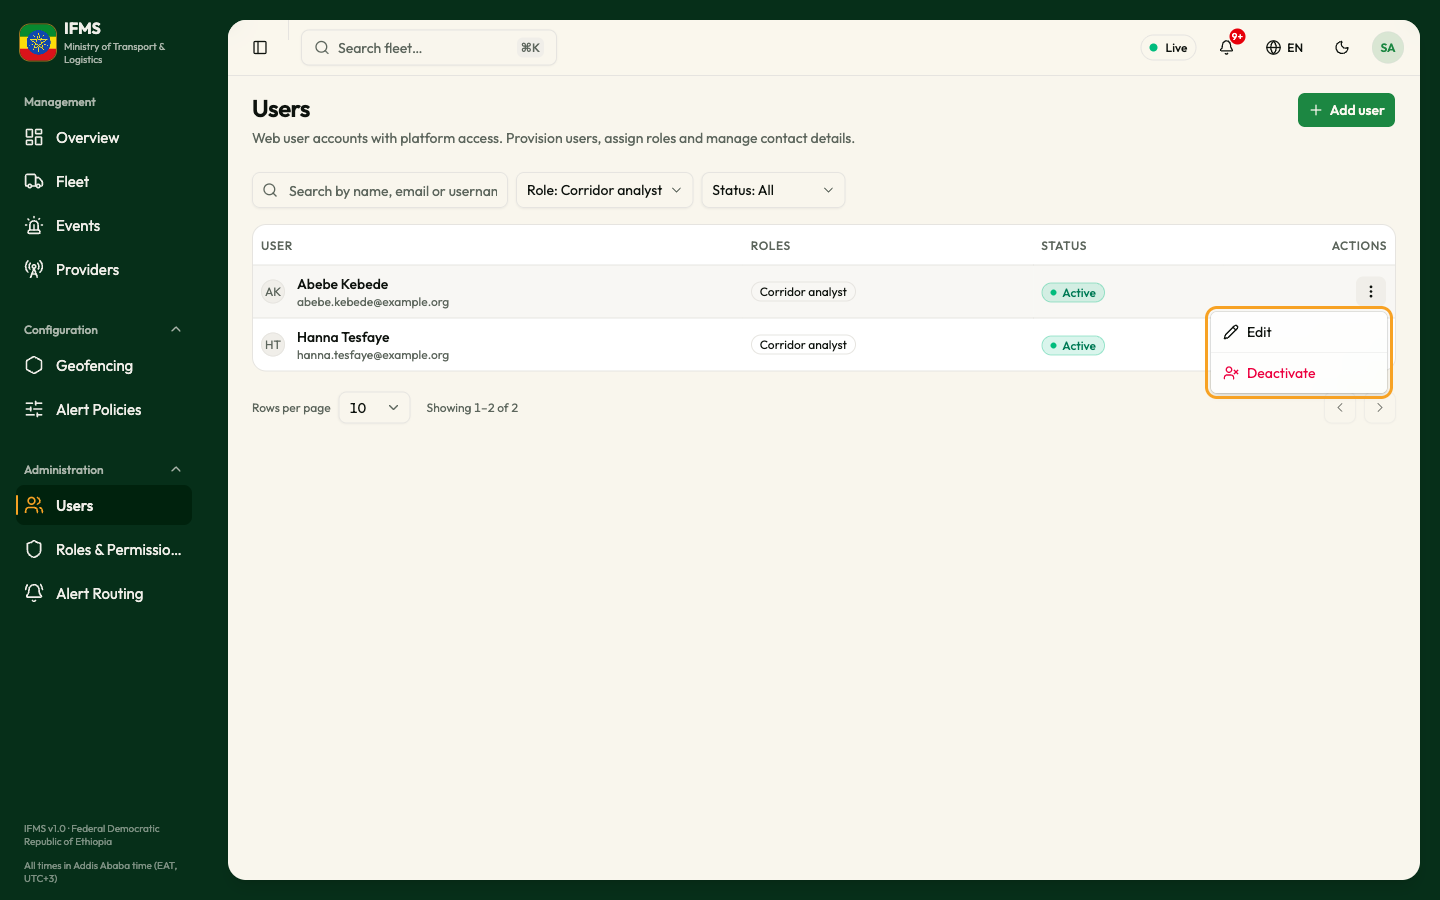
| Account | Menu items |
|---|---|
| Active | Edit, then Deactivate (red) |
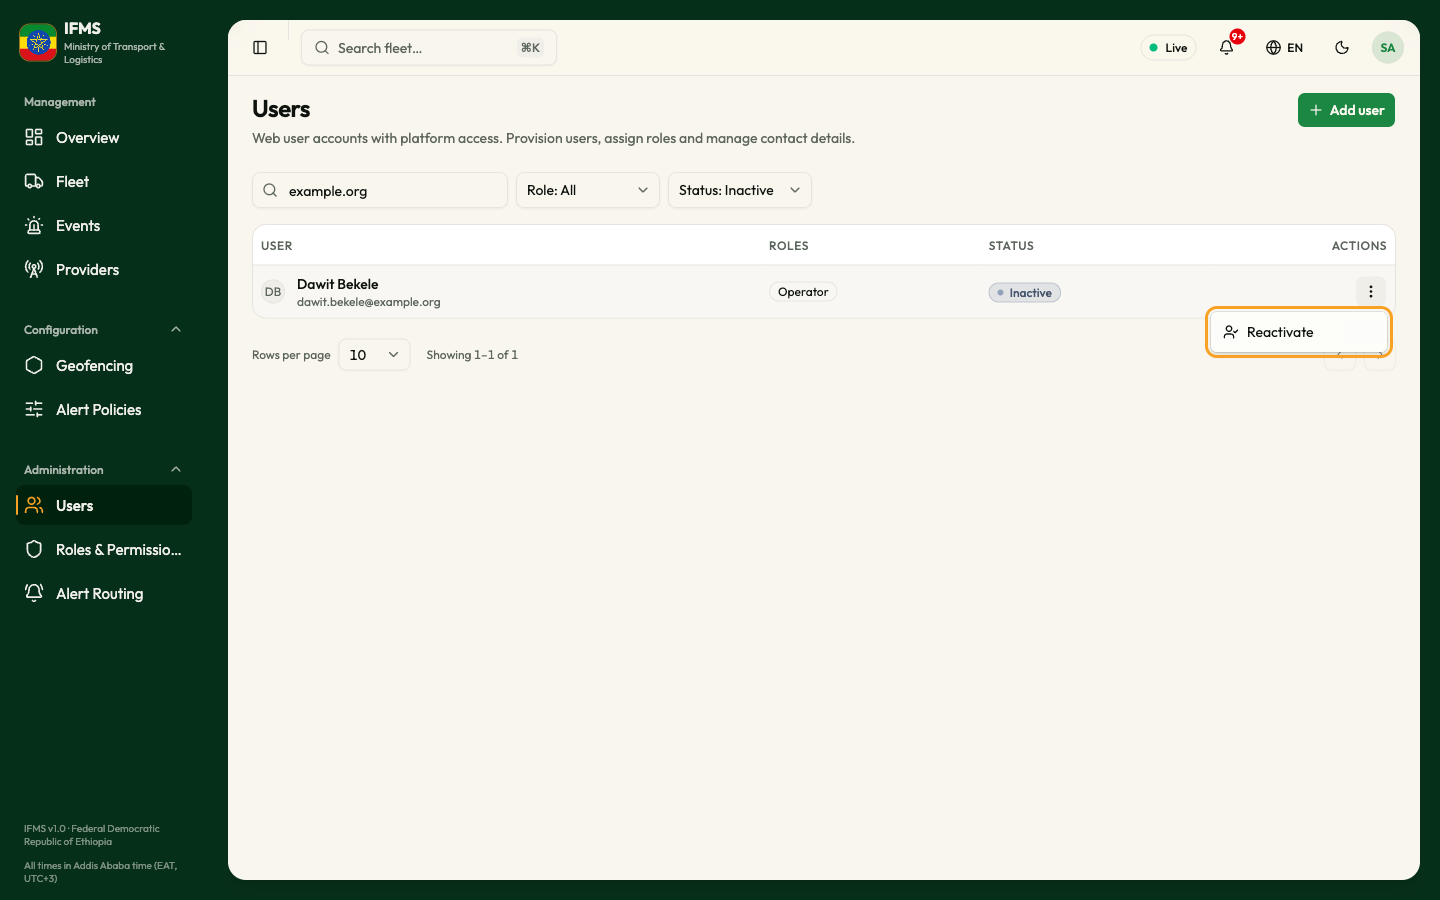
| Inactive | Reactivate |
Each item appears only if your role allows it.
Which roles you can give
The roles picker in Add user and Edit user offers only the roles you are allowed to give.
| You are | You are offered |
|---|---|
| System admin | All person roles and every custom role that is switched on |
| Operational manager | Operational manager, Supervisor and Operator |
| Supervisor or Operator | None. These roles cannot create or manage users. |
Three more points:
- Machine roles are hidden from all role lists and pickers.
- A role that is switched off is never offered to add.
- When you edit someone who holds a role you may not give, that role shows as a grey chip with a padlock under the picker. Hovering it reads "You can't change this role". Saving leaves it on the account. Ask a System admin to add or remove it.
If a role you need is missing from the picker, you are not allowed to give it. Ask a System admin.
Add a user
You will create an account for a new colleague and give them their roles. IFMS then emails them so they can choose a password and sign in.
Before you start
- You need the right to create users (System admin or Operational manager).
- Have ready: the person's first and last name, their work email address, and the roles they need. A phone number is worth adding — it is the only way they can receive alert text messages.
- If the colleague had an IFMS account before, do not add them again: reactivate the old account. To check, set Status to All and search for their email address.
Steps
-
Select Add user at the top right of the screen.
-
Type the First name and the Last name. Both are required.
-
Type the Email. This is both the address IFMS writes to and the name the person signs in with, and it cannot be changed afterwards, so check it carefully.
-
Select the Roles box (it reads Select roles…) and pick one or more roles. Type in the search line to narrow the list, then select a role to tick it. Select it again to untick it. The list holds only the roles you are allowed to give — see Which roles you can give.
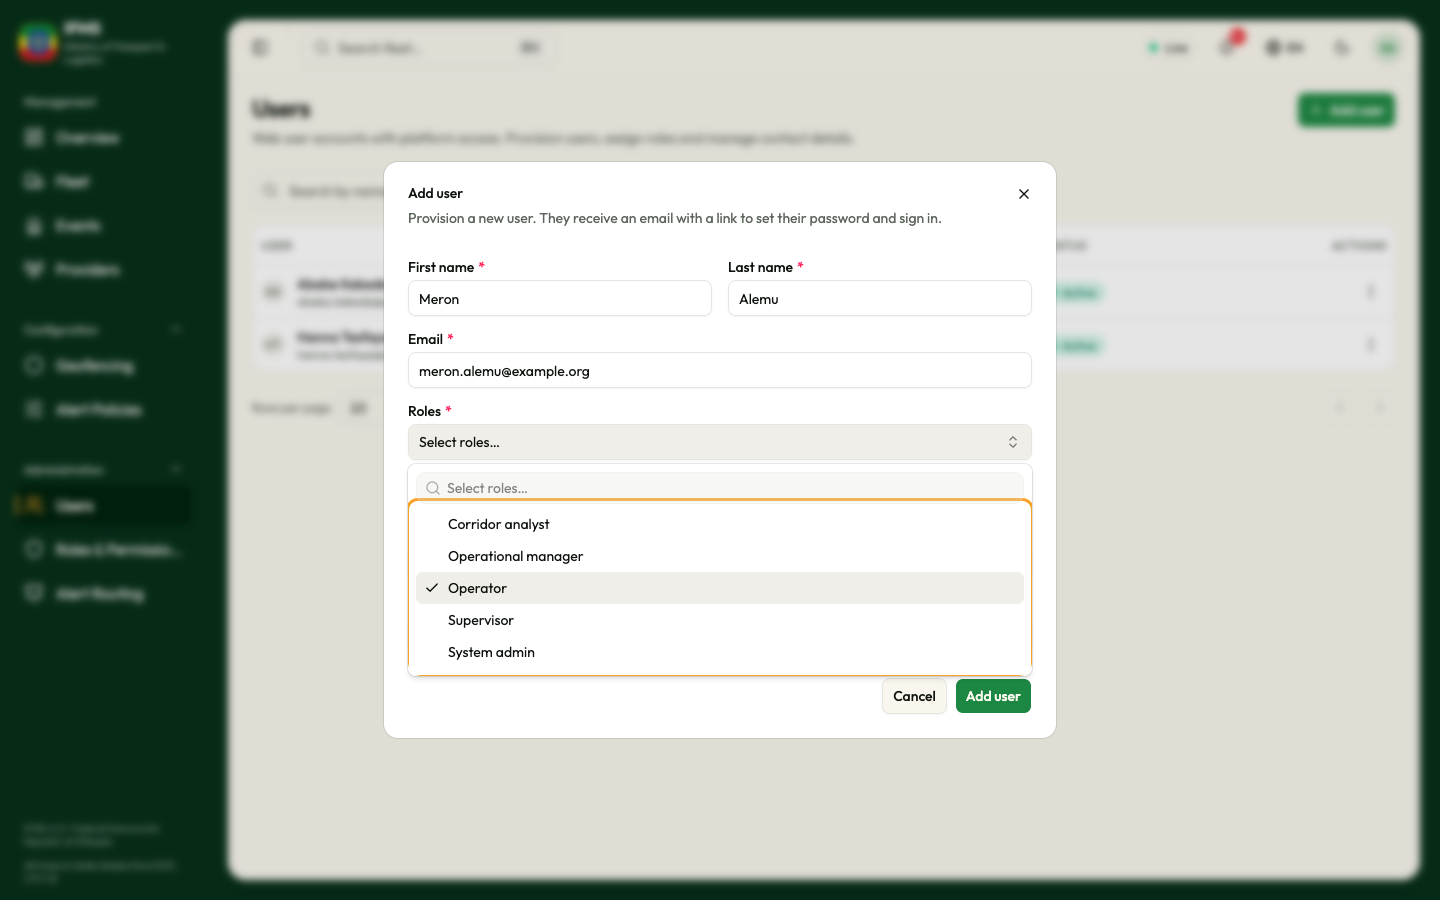
Each chosen role appears as a chip under the box. Remove one with the small ✕ on the chip. Close the picker by selecting the box again.
-
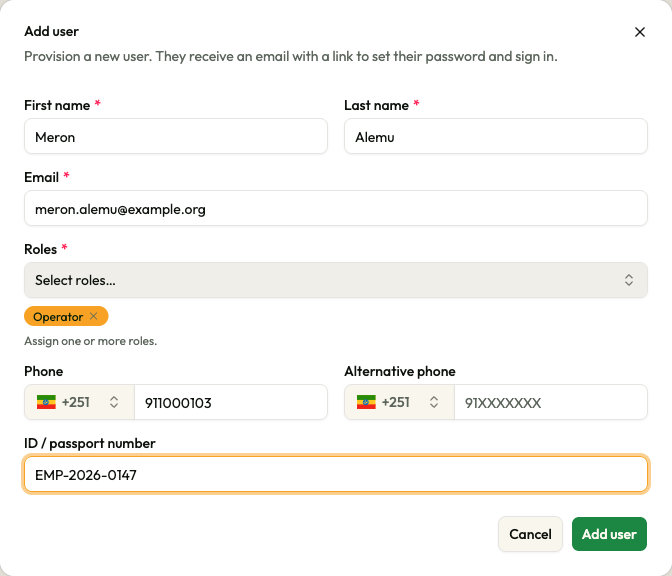
Optionally fill in Phone. Leave the country flag on +251 for an Ethiopian number and type the 9 digits without the leading 0 — type
9XXXXXXXX, not09XXXXXXXX. The box shows the expected shape (91XXXXXXX) and refuses anything longer. -
Optionally fill in Alternative phone the same way. It is a second contact number only; IFMS never sends text messages to it.
-
Optionally type an ID / passport number.
-
Check everything, then select Add user. The button stays greyed out until the first name, last name, email and at least one role are filled in.
To abandon the account instead, select Cancel or the ✕. Nothing is saved.
The fields
| Field | Required | What to enter | Rules and messages |
|---|---|---|---|
| First name | Yes | Given name | Cannot be blank. Up to 120 characters. |
| Last name | Yes | Family name | Cannot be blank. Up to 120 characters. |
| Yes | Work email address | Cannot be blank, and must look like an email address — your browser says so in its own words. Up to 160 characters. Locked when you edit the person later. | |
| Roles | Yes | One or more roles | At least one. Only roles that are switched on and that you are allowed to give can be picked. |
| Phone | No | Mobile number, no leading 0 | Checked against the chosen country when you submit: "Phone number is too short", "Phone number is too long", "Phone number has invalid length", "Invalid phone number format", "Invalid phone number for the selected country" or "Invalid phone number". The message appears in red under the box and clears as soon as you correct the number. |
| Alternative phone | No | Second number | Same checks. Never used for text messages. |
| ID / passport number | No | National ID or passport number | Up to 80 characters. |
What happens next
- A green message appears: "User name added."
- A second small window confirms the email: "Onboarding email sent", with the line "name@example.org will receive an email with a link to set their password and sign in." and, in small print, "If the link expires before they use it, they can request a fresh one via 'Forgot password' on the sign-in page." Select Done to close it.
- The new colleague receives an email titled "Welcome to IFMS — your account is ready". It carries a link that lets them choose a password, after which they land on the IFMS sign-in page with their email already filled in. The link stops working after seven days. If the email does not arrive, ask them to check their spam folder.
- Until they set that password, the account cannot be used.
- If the link has expired, they use Forgot password on the sign-in page, which sends a fresh email titled "Set your IFMS password".
If the address already belongs to an account in the wider Ministry sign-in system, but not to anybody in IFMS, IFMS links that account instead of creating one. You still see "User name added.", but there is no "Onboarding email sent" window and no email is sent. The person signs in with the password they already have, or uses Forgot password.
If something goes wrong
A red message appears at the top right and the window stays open so you can correct the details.
| What you see | What it means | What to do |
|---|---|---|
| "A user with that email or username already exists" | The address belongs to an IFMS account, active or deactivated. It also appears for a minute or so after an Add user that failed half-way, while IFMS finishes it. | Set Status to All and search for the address. If the account is inactive, reactivate it. If a previous attempt failed, wait a minute and refresh the list. |
| "More than one identity matches that email or username" | Two accounts in the Ministry sign-in system match the address. | Ask whoever runs the Ministry sign-in system to sort out the duplicate. |
| "No such role in this tenant" | A role was deleted while the window was open. | Close the window, reopen it and pick the roles again. |
| "You may not grant that role" | A role you picked is outside what you may give, usually because the window was open while your own roles changed. | Close the window, reopen it and pick from what is offered. |
| "The identity provider is unavailable" | The Ministry sign-in system did not answer. | Try again later. |
| A red message with a field name in front of it | One of the values was refused, for example a name that is too long. | Correct that field and submit again. |
Edit a user
- Select the person's row, or open the row menu and select Edit.
- Change the First name, Last name, Phone, Alternative phone or ID / passport number, and add or remove Roles.
- Select Save changes. A green "User updated." confirms it.
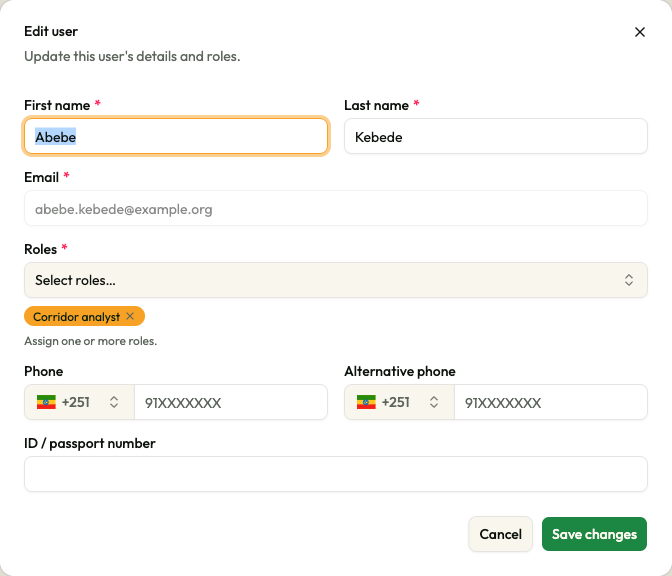
- Email is greyed out. A sign-in address cannot be changed. If a colleague needs a new address, create a new account and deactivate the old one.
- A role that was switched off after it was given to this person still shows in the picker, so you can take it away.
- Roles you may not give show as padlocked chips and stay as they are — see Which roles you can give.
When the details save but the roles do not
IFMS saves the details first and the roles second. If the roles are refused, the window stays open with an amber box reading "Profile saved; roles weren't changed.", the reason underneath, and a Retry roles button.
| Reason in the amber box | What to do |
|---|---|
| "You may not grant that role" | Remove the role you added; you are not allowed to give it. |
| "This is the last active holder of a required role in this tenant" | You tried to take System admin away from the only person who still has it. Give System admin to someone else first. |
| Anything else | Select Retry roles, which sends the same roles again. |
Deactivate a user
Use this when a colleague leaves or moves to other work.
- Open the row menu on their line and select Deactivate.
- Read the question: "Deactivate user?" — "name loses access immediately. They stay in the list as inactive and can be reactivated later."
- Select the red Deactivate to go ahead, or Cancel to leave everything as it was.
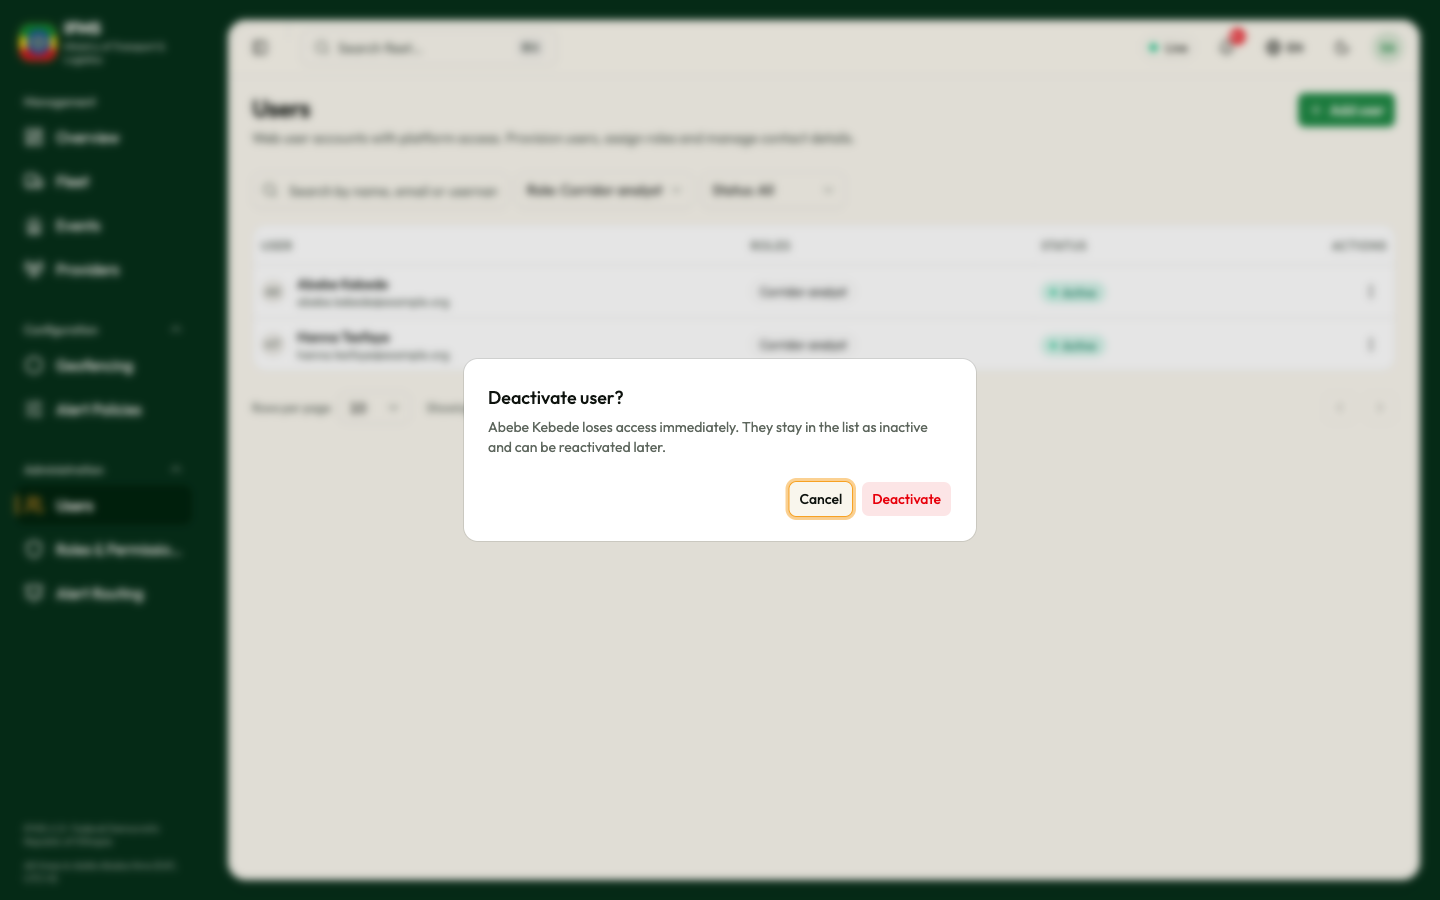
A green "User deactivated." confirms it and the row turns Inactive.
What happens to the person: they are signed out everywhere at once and cannot sign back in — the sign-in page tells them their account is disabled. Alert routing stops writing to them. Their roles are kept, so reactivating restores exactly what they had.
Anyone allowed to deactivate users can deactivate any colleague except themselves and the last active System admin. A refusal appears as a red message and changes nothing:
| Refusal | What it means |
|---|---|
| "You can't deactivate yourself." | Ask another administrator. |
| "At least one System admin must remain active." | This is the last active System admin. Give the role to someone else first. |
| "The identity provider did not disable the account" | The Ministry sign-in system did not confirm the change. Try again. |
| "The identity provider is unavailable" | The Ministry sign-in system did not answer. Try again later. |
Reactivate a user
-
Set the Status filter to Inactive, or search for the person by name or email address. Use these rather than the Role filter to find an inactive colleague.
-
Open the row menu on their line and select Reactivate.
-
Read the question: "Reactivate user?" — "name can sign in again with their previous roles."
-
Select Reactivate, or Cancel.
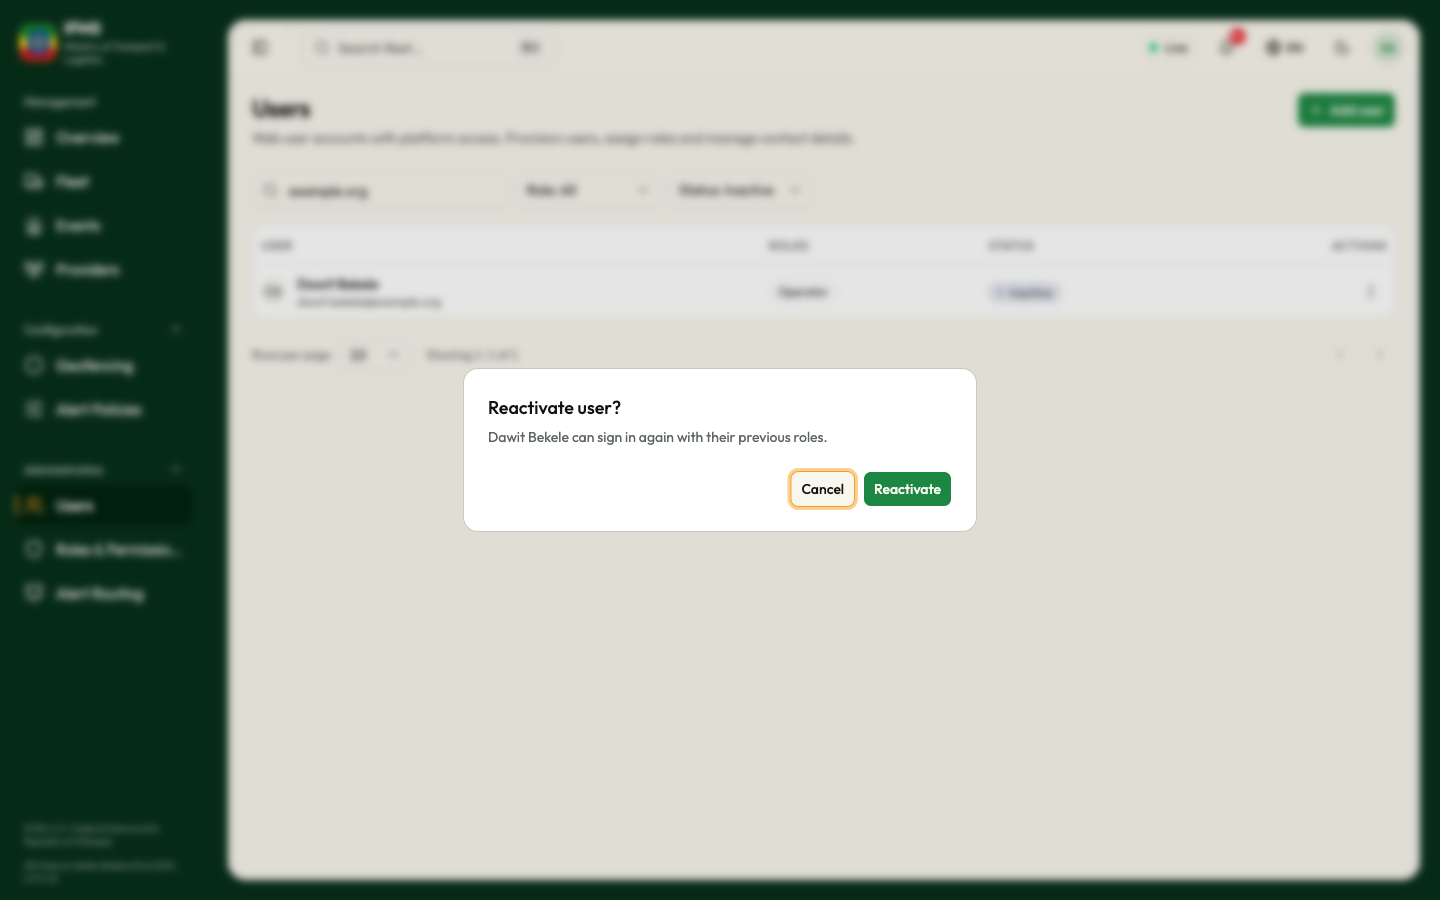
A green "User reactivated." confirms it, the row turns Active, and the person can sign in again with the password they had.
Related pages
- Roles and permissions — what each role grants, and how to build your own.
- Alert routing — which roles receive alerts by email and text message.
- What each role can do
- Sign in — what a new colleague does with the email they receive.